Fountain Pen Care Instruction
Like any well-tuned machine, fountain pens need periodic cleaning to keep them performing their best. This article will cover the basics of fountain pen cleaning.
WHY CLEAN A FOUNTAIN PEN?
Fountain pens rely on capillary action to work. Over time, dust, fibers, and flakes of dried ink can build up in the nib and feed, disrupting the capillary action and causing the pen to write poorly. Symptoms of a pen in need of cleaning include slow or inconsistent ink flow, scratchiness, and skipping.
WHEN TO CLEAN A FOUNTAIN PEN?
Fountain pens should be cleaned every 4-8 weeks, even if they are still writing well. Fountain pens should also be cleaned whenever you are changing from one ink to another.
BASIC CLEANING
If your pen is writing well and you will not be changing inks, a basic cleaning should be sufficient.
Step 1: Disassemble the Pen
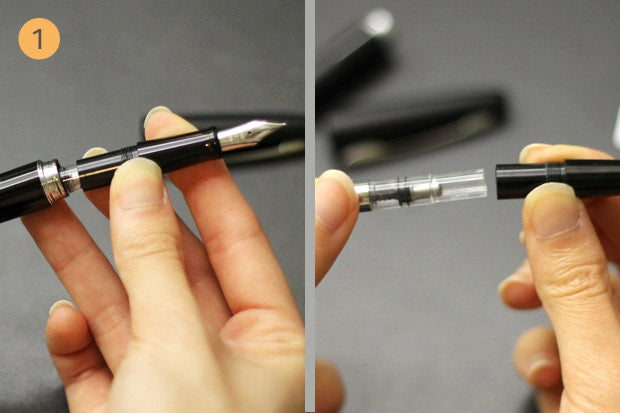
First, uncap the pen and remove the nib section (also referred to as the grip section or just "the section") from the barrel of the pen. This is usually done by unscrewing the pen where the nib section meets the barrel. Remove the ink converter or cartridge from the nib section.
Step 2: Rinse
Rinse the nib by filling and emptying it with water (until the water is clear).

Use only cold or room-temperature water when cleaning a fountain pen. Hot water may warp or damage some components. It is best to use distilled water instead of tap water (Tap water sometimes can clog the feed).
Use only cold or room-temperature water when cleaning a fountain pen. Hot water or alcohol may damage the component and the inner works of the pen.
Step 3: Soak

Submerge the nib inside a cup or beaker with distilled water and let it soak. Change the water if it is already saturated with ink. Repeat this process until the water is clear. Please note that the inks are different. Saturated inks or water resistant inks need longer time to be cleaned than other ink.
Distilled water is better if you have a tap water with high mineral content. Please remember that the water level must completely cover the nib.
Step 4: Dry

Remove the nib from the water and let it dry overnight. For the best result, wrap the nib with a soft cloth or paper towel to help draw the water out of the nib. Put it inside the small cup and in an upright position.
Step 5: Reassemble The Pen

Once the nib completely dry, install the cartridge or converter if the pen uses one, and screw the nib section back into the barrel.
Please Wash the pen every few weeks or whenever you want to change ink colors.